top of page

juppp not one old teddy jacket is safe near me


need:

an old teddy jacket or coat or teddy fabric

padding or foam

cardboard tubes or as an alternative plastic tubes or wooden pillars

double sided tape

upholstery stapler or staple gun

a piece of wood for the top

jigsaw to cut the legs and the top

scissors and pen

screws or super strong glue


Version one: the glued on leggedie legs and new fabric

measure your legs and cut them your desired length. I wet with about 40 cm for a super low mini stool and 80 cm for a bench.


decide on how many legs you want, can be three as a cluster or four when you're about to make a bench.


plan your top accordingly so your legs match the size of the seating area.


for the small stools I wet with a super tight snug fit to have it over all rather short and small, and not a huge overlap.


take your double sided tape and tape the whole surface of the legs.


you can do super close tape next to tape or leave 2-4 cm in between tape strips.


but surely do enough so you don't get warped hanging down fur after a while.


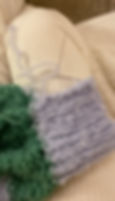
once you've peeled away the film of the tape place the leg onto your fabric.


try to place the edge in the middle of a piece of tape so both ends of the teddy fabric meet in the middle of a piece of tape.


this way you don't have loose bits flopping around.


cut the excess fur on the side thats going to meet the seating to have a clean surface to put glue on


for the bottom (the part thats stands on the floor) you can do the same and cut it flush with the tube,


or you can wrap the bottom and stick it into your tube - if you use a full wood pillar I would just cut it like the top


once you have your fur covered legs its time to do the seat


cut your wood with a jigsaw


once you've cut your wood cut your padding as well. I use super thick 4 cm quilt padding, and sometimes I do two layers of it


you can use the double sided tape to stop it from sliding around during the next step


cut a piece of your teddy fur big enough to wrap around the edges easily.


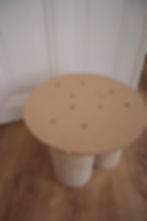
mark where your legs will sit.


the drill holes are another option to assemble. if you want to screw your legs onto the top, drill holes like on the picture and screw trough the top into the legs before you glue on the padding. (pictures are further down with the other stool)


start to staple the fur onto the back of the wood. keep an eye on the markings of where the legs go and make sure you don't staple on top of the markings.


you can pull slightly to get a smooth circle, but don't pull too much before you've secured the fabric all around, you might drag the padding across the wood other wise.


easiest is to set 6 staples in a star pattern around the whole circle and then start to pull the rest tight and snug.


cut away the excess fur to have a clean look.


Ive covered the wood as much as I could in between the legs to get a over all fur look, but you can leave party of the wood showing, since the stool is so low no-one is going to see it anyways.


ok .... motivation took over and I forgot to take pics of the glue part, but basically I smeared super strong glue across the markings and the rim of the tubes and placed the legs onto the wood. I put heavy books on top to really press the pieces together and let them dry over night. if you use wood pillars you can do the same thing and just smear the whole top of the pillar in glue. if your cardboard tubes are a little thinner (don't use the inside of kitchen towels haha they have to be somewhat stable to work as furniture) it still will be pretty easy to glue as log as you got a smooth rim at your cardboard tube. since the cardboard will soak up some of the glue make sure you use more than you think.


tipps for sourcing cardboard tubes of any kinds: I get mine from a factory near by my house. they use big rolls of cling film to wrap their products when they get shipped, the tubes are what's inside of the huge cling film rolls. so I just stop by and get the tubes, cause they are just landing in their trash cans anyways. you can ask at your local hardware store, they do have sort of the same tubes to store ropes on and stuff, also generally checking out the trash where some kind of packing and unpacking happens is an option. lastly you can get cardboard tubes to ship and store posters and such, thats also an option. just make sure they have somewhat of stability in itself.


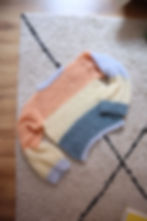
Version two: screwed on legs and recycling old teddy garments

you will need legs, a top piece of wood and some padding as before and some kind of old teddy piece of clothing.


ideally with kinda big panels of fabric, but well make it work


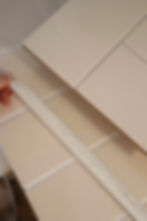
first you gotta cut apart the jacket or coat. ideally you cut super close to the seams to get big pieces.


cut into the inner fabric covering to revea the seams of the outer fabric and cut along the seams. get rid of buttons and such


when picking your piece of clothing you kinda have to check if there will be enough for your piece of furniture. in my case one front panel was the same width as my legs were long so I knew I could at least make two legs just with the front panels.


same thing as before cover the legs with tape and then with the fur.


keep all excess cuttings!


cut straight and super close to the other side of the fabric. as mentioned above, try to start and end the wrapping in the middle of one strip of paint to have the loose edge completely glued down


try to meet the edges and blend the cut with the fur ( its gonna be hidden anyways cause you can place the seams facing inwards when attaching the legs)


thats one leg done with the seam up front on the right


I ended up not having one long enough strip of fabric for the third leg, so I just glued the leftovers from the first two together, as before just make sure all raw edges are glued dow and cut super close to each other


so thats my leg with two seams


next I screwed the legs onto the top board from the top. so if you put on the padding the screws are hidden and everything looks tidy and cute


place your padding on top and staple away.


I ended up using a sleeve for the top part, with had a side seam, but its not really that visible.


when stapling I just tried to put the staples as close as possible to the legs and cut around the legs to get rid of the excess flaps


just because I was bored and sick.


need

for both of them I used a 12 mm needle / loop for most parts

a 6 or 9 mm needle for the ribbed parts

a 9 mm crochet hook to sew (crochet) the pieces together

a needle

wool


this is the wool I used for all of them, I used a 12 mm needle to get a super loose knit


so you basically knit the sleeves open as rectangles 50 rows long, 10 rows in each colour. once you have your 50 rows long sleeve, insert the 6mm needle in your first row to make the ribbed part. knit one right and one left stitch alternating, 15 rows.


so thats how I make the ribbed part, when you pick up the stitches onto a smaller needle, go in every right leg of the v that one stitch is creating.


to close the sleeves I crochet the open sides together, take a kinda big hook to have a bit of stretch in your crochet as well.


use matching yarn, other wise you will be able to see the crochet stitches from the front


for the ribbed part I just used a needle


the whole cardi is just rectangles, sew the shoulder seams together having the fronts meet in the middle.


sew the sleeves in ( I ran outta green so I had to use grey) this is also with a crochet hook, I just pick up one stitch from every side (one fron the sleeve and one from the torso part and pull a loop with the crochet hook to join them)


once the sleeve is in close the side seam


thats the stitches peaking through if you use another colour to sew pieces together, you can use it on purpose to create a cool effect, I just had to.


this one I knitted in a loop until I reached the upper third, then I slit it in half and knitted every side individually to have holes for the arms.


finally one that looks good from all angles aka crisp clean sexy sides


need

- tiles of your choice (these are called subway tiles)

- mdf base to match your desired tile pattern (5 mm thick mdf is what I went for)

- tile glue or any kind of glue

- grout

- all purpose glue

- framing profiles in gold (brass) or white ... you can get them in all kinds of metals and plastic finishes at the hardware store (mine are 15x15mm)

- handsaw to cut your framing

- grout

- gloves

- ruler or something to make a 45 degree line


first plan your size.


I went with a 30 x 40 cm mdf board, if you plan to use tile spacers get your tiles and spacers first and lay them out with spacers to get the exact measurements with the spacers in between.


you can use these mosaic sheet mats, if you're not about the spacer game. on the mats they are preset so you only have to glue down the whole mat.


I went with no spacers and just put the tiles super close to each other, you'll still get a tiny little grout gap.


the glue

for such small projects I tend to go with hot glue, its easy and fast and holds tiles super well. I feel its best to put the hot glue on the mdf and then the tile on top, since the tile is cold the glue hardens super quick, so make sure you squeeze and wiggle it in place instantly when you lay down your tile.


of course you can use tile glue, and I would recommend with projects like a table top, its way faster than hot glue on big surfaces.


both works.


The cover up

once your tile is set and glued on you can take care about the edge.


I've made several projects now using brass and plastic profiles, both works the same way, you cut them the same length as your tray (maybe 1 mm longer on each side to prevent gaps at the corners


the profile has two sides one thats going under the tray and one thats going to be shown as the outer edge of your tray.


the side thats shown on the side is just cut to match the measurements of your tray

(2 pieces 30 cm 2 pieces 40 cm in my case)


the side of the profile thats going under the tray is the same length minus a 45 degree corner. this way they won't overlap underneath the tray and will sit flush all around.


cut the side part just straight down and then angle the saw to cut away the 45 degree corner


thats how you wanna cut them, they'll meet with the 45 degree angle at the bottom and flush in a straight line at the side thats seen


thats the tray upside down, if you hand cut the profiles they might be a slight bit wonky but I just squeezed in white grout afterwards and the gap was closed.


once all 4 sides are cut take some hot glue or all purpose glue and glue them in place.


I put a strip of glue right in the corner so when I pushed it onto the tray the glue distributed itself through the profile but I wasn't squeezing out, so don't put too much


so thats the profiles on. I decided to add some wooden pearls as little feet to elevate it a bit but you can just keep it flat.


thats the little feet, I just glued them on with hot glue


The Grout

ok we know we can dye grout any colour . but I felt just like plain white to match the profile outer edge in white.


mix your grout to a paste like consistency, I just smear it across the surface and into the grout ridges with ma hands wearing gloves.


super handy is one of these sponges to smooth out the grout once distributed, I just dampen it and run it across the whole piece to even everything.


don't forget to fill the space between the profile and the tile to get a super finished look.


let dry and wipe clean once completely cured.


and thats done. as you can see I made a topper for this cabinet just as I made the tray wit mdf as base and then a brass profile to cover the raw side. I feel this totally elevates the whole thing a good bit.


The coaster version

is basically the same just in much smaller


need:

- mosaic tiles

- mdf in 0,5 mm

- brass profile 15mm

- saw for the mdf & one for metal

-hot glue or tile glue

- grout

- a ruler with a 45 degree


plan out how big you want your coasters to be and mark the size on the mdf.


you can peel the tiles off the net base and reset them. I peeled four off and turned them to get a cute pattern


cut your mdf to match your tile sleeve, really go with the measurements of your tile, if you plan to use spacers, lay your tiles down with spacers ans measure how big of a mdf you need.


once cut put your tile on one more time to make sure they fit, just in case you've had a woke cut with the saw or something.


then match your brass profiles to the length of the mdf. I try to make them 1 mm longer on each side to really have them touching at the corners.


same as with the tray: you need the side of the profile to be cut to size just straight down, and the side thats going under the mdf needs to have the 45 degree corner cut out so the profiles don't overlap at the corners and lie flush.


do this for all four sides


then take your metal saw and cut them all to measure.


once all are cut you can place them around the mdf to glue the tiles down, this way you will make sure that your tiles won't stick out too much.


I like to use hot glue on such small projects, but its up to you.


once the tiles are glued on go ahead and glue the metal trim on the sides, I used hot glue for that as well.


once all sides are glued there's just one last step: the grout.


grout as usual: if you use brass profiles be a bit careful to not get too much on the brass, it tends to react and makes a black residue, wich can fuck up your grout color, especially white one. but if you try to not rub it onto the brass like crazy its fine!


once dry its done!


bottom of page